
Call block lists
A call block list blocks calls to and from unwanted numbers across your entire account. When a call matches an entry in the list, Live Hub disconnects the call immediately.
Numbers can be added to the block list in two ways: - Your phone number provider can identify numbers as spam or otherwise suspicious. Live Hub can automatically add those numbers to the block list. - You can manually add phone numbers or number prefixes when you identify unwanted calling patterns.
Live Hub blocks calls before they consume resources or incur charges: - Blocked calls do not count toward your calls per second (CPS) limit. - You are not billed for blocked calls. - Blocked calls do not appear in dashboard metrics, which helps prevent spam traffic from skewing your reports. - Blocked calls remain available in routing history for 30 days, allowing you to review what Live Hub blocked.
## Add a number or prefix
A call block list entry can block a specific phone number or an entire number prefix. You can configure the entry to match the called number, the calling number, or both.
To add an entry:
-
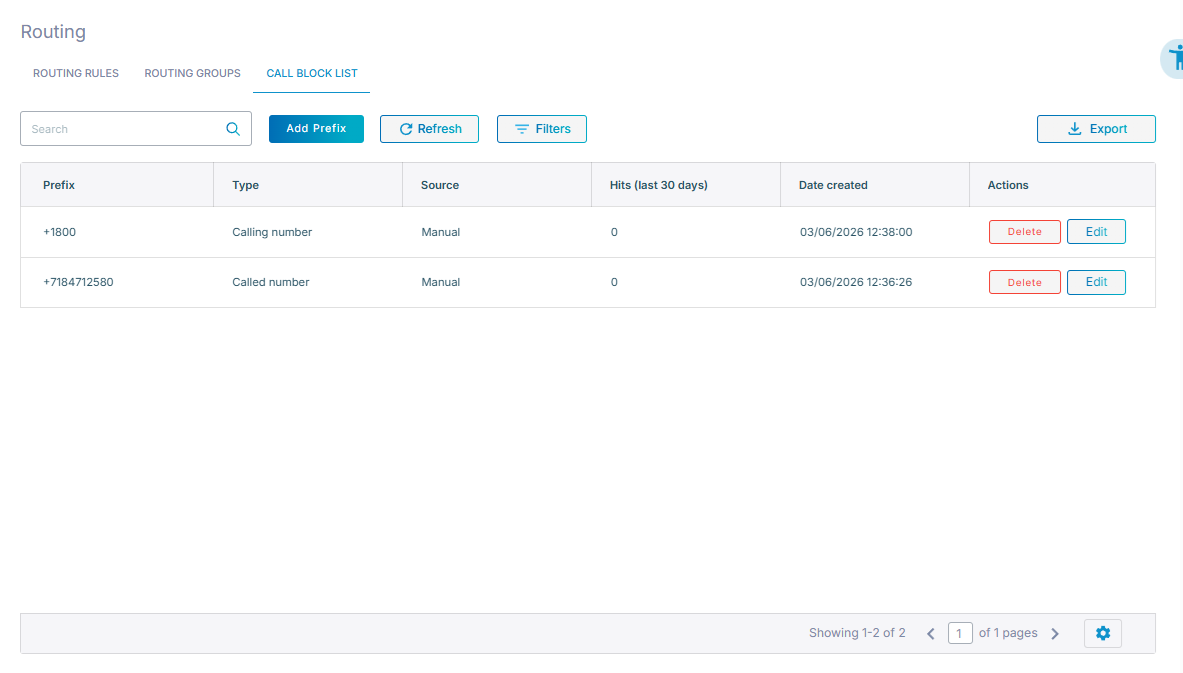
In the Navigation pane, select Routing, and then select the Call Block List tab.
-
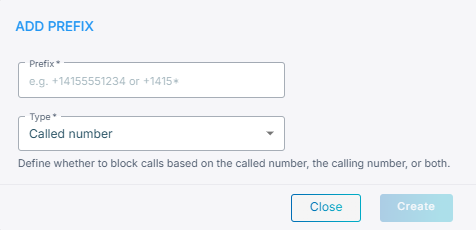
Click Add Prefix.
-
In the 'Prefix' field, enter a full number or a prefix. A prefix can end in
*. -
From the 'Type' drop-down list, select which number the entry matches on: Called number, Calling number, or Called and Calling numbers.
-
Click Create.
Live Hub checks the entry and rejects duplicates. Once accepted, the entry takes effect immediately.
Block list columns
The Call Block List tab displays one row for each block list entry.
| Column | What it holds |
|---|---|
| Prefix | The number or prefix being blocked. |
| Type | Whether it matches the called number, the calling number, or both. |
| Source | Whether the entry came from your provider or from you. |
| Hits (last 30 days) | How many calls it has blocked. |
| Date created | When it was added. |
| Actions | Edit and Delete. |
Click Filters to narrow the list, or click Export to download it.
Edit or delete an entry
In the Actions column for the entry, do one of the following: - Edit: Change the prefix or match type, and then click Update. - Delete: Delete the entry, and then confirm the deletion.
Changes takes effect immediately.